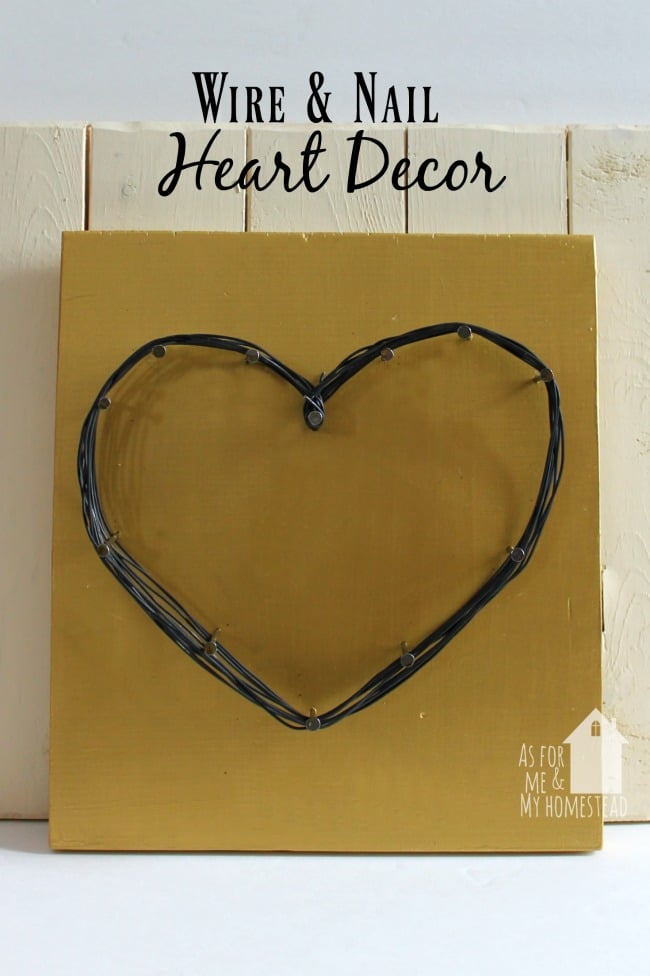
This Wire and Nail Heart Decor is both beautiful and simple at the same time! It’s an easy, rustic craft that you can finish in half an hour! Perfect for a small budget!
Originally published in 2017
If you’ve ever been to my house, it’s pretty plain. It’s not because I don’t like decor. In fact, I love browsing the decor sections of stores. But the truth is, I don’t have an eye for artfully arranging decor. Isn’t that sad?
In our last house, I had one of my dearest friends come over, and we looked through my decor, and she put things where she thought they would look cute. It was such a huge relief, since I had giant walls to fill, and I really did want it to look nice.
Now that we’re on the homestead, my wall space in nearly non-existent, so simple decor works great, which is good for my lack of artistic skill!

If you enjoy this type of art project, you’ll probably enjoy making these String Art Trees as well.

After putting away all of the Christmas decor and the tree, my house was looking sad and bare, so I decided it was time to make something new and fun. It was far too cold to go out and dig through the shed for craft supplies in the below zero weather, so I had to work with what I had in the house and in Dan’s shop.
I happened to have paints out from making signs for my mom and my mother-in-law for Christmas, as well as a piece of wood. So I dug around and found the roll of fencing wire that I picked up at the local Cal-Ranch several years ago. It’s come in handy so many times that is has definitely paid for itself! Then I just needed to beg some nails off of Dan, and I was ready to go to work on this wire and nail heart decor.
This was so easy. You don’t have to be crafty at all!

Start by painting a board (I used this {affiliate link} 14K gold paint).
Once the paint is dry, eyeball it and hammer in a nail where you want the bottom of the heart to point, and then another nail straight above that where your heart will dip down (is that the right way to say that?).
Then add several more nails to create the shape of a heart. You can add a lot, or not very many. I only happened to have taken 12 from Dan’s shop, and I didn’t want to bundle up to go back out and get more, so I worked with what I had!
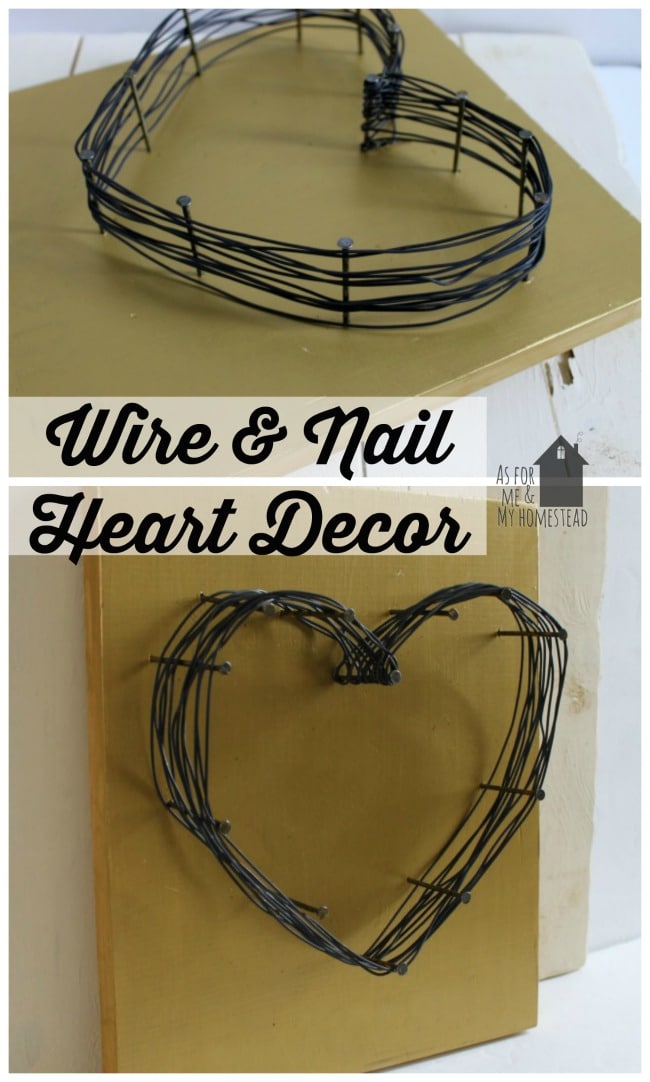
After you’ve got your heart shape in place, it’s time to string the wire.
Make a small loop at the end of your wire, and slip this loop onto the nail where your heart dips down (the center top nail). Then slowly start to wind the wire around the nails. On the first round, you don’t want to pull too tightly, or you may pull the loop off of the first nail.

Once you get around the heart, wrap your wire in a loop around the first nail, and continue on. You can go around as many or as few times as you’d like. When you’ve got all the wire on your wire and nail heart decor that you’d like, make one final loop around the nail, and cut off your end with wire cutters.
Easy peasy!
I just love how my wire and nail heart decor turned out! It’s simple and rustic. I love the gold (which I don’t usually use) because it makes the wire seem even more rustic.
Are you a talented decorator, or do you get intimidated by the process like me?
This is such a cute idea! I love it!
I was so happy how it turned out, and I couldn’t wait to get it back out after Christmas!
This is gorgeous. It would go perfect with the rest of my rustic/farmhouse decor!! I’m pinning it so I don’t forget.
Jamie
Thanks! I was so excited to pull it back out again, now that the Christmas decor is put away. It’s just a fun piece!
Very cool! Sharing. Visiting from Pretty Pintastic Party.
Great idea! So creative!
Thanks! I really love how it turned out!
This would be perfect for our entry way in our house!
I hope if you make it, you’ll come back and share a picture and tell me how it went, Dan!
I’m not very crafty but I might be able to handle this!
You definitely could! There is very little crafting skills involved in this project. It’s so easy!